在Android系统中提供了两种动画实现方式:一种是Tween动画,通过视图组件移动、放大、缩小,以及产生透明度的变化等来实现动画;另一种是Frame动画,这是一种传统的通过顺序播放排列好的图片来实现的动画方法,类似电影。
本文先介绍一下Tween动画。
Tween动画能完成一系列诸如位置、尺寸、透明度和旋转等简单的变化。例如,对程序中的ImageView组件,可以通过Tween动画使该视图实现放大、缩小、旋转、渐变等变化。下面就对Tween动画类进行简单介绍。
Tween动画类位于android.view.animation包中,该包中包含了一些常用的动画实现类。
□ Animation:动画抽象类,其他几个实现类继承该类。
□ ScaleAnimation:控制尺寸变化的动画类。
□ AlphaAnimation:控制透明度变化的动画类。
□ TranslateAnimation:控制位置变化的动画类。
□ AnimationSet:定义动画属性集合类。
□ AnimationUtils:动画工具类。
总体来讲,在Android系统中,Tween动画有4种表现方式:渐变、缩放、平移,以及旋转。对这4种方式的实现方法详细说明如表1所示。
表1 Tween动画实现表
| 名称 |
实现类 |
常用构造方法 |
参数说明 |
| Alpha(渐变动画) |
AlphaAnimation |
AlphaAnimation(float fromAlpha,float toAlpha) |
fromAlpha:动画开始透明度
toAlpha:动画结束透明度(取值范围0.0~1.0) |
| Scale(尺寸变化动画) |
ScaleAnimation |
public ScaleAnimation (float fromX, float toX, float fromY, float toY, int pivotXType, float pivotXValue, int pivotYType, float pivotYValue) |
fromX:起始X坐标上的伸缩尺寸
toX:结束X坐标上的伸缩尺寸
fromY:起始Y坐标上的伸缩尺寸
toY:结束Y坐标上的伸缩尺寸
pivotXType:X坐标伸缩模式(取值有Animation.ABSOLUTE、 Animation.RELATIVE_TO_SELF、 Animation.RELATIVE_TO_PARENT)
pivotXValue:相对于X坐标伸缩值
pivotYType:Y坐标伸缩模式(取值有Animation.ABSOLUTE、 Animation.RELATIVE_TO_SELF、 Animation.RELATIVE_TO_PARENT)
pivotYValue:相对于Y坐标伸缩值
|
| Translate(位置变化动画) |
TranslateAnimation |
public TranslateAnimation (float fromXDelta, float toXDelta, float fromYDelta, float toYDelta) |
fromXDelta:起始X坐标
toXDelta;结束X坐标
fromYDelta:起始Y坐标
toYDelta:结束Y坐标
|
| Rotate(旋转动画) |
RotateAnimation |
public RotateAnimation (float fromDegrees, float toDegrees, int pivotXType, float pivotXValue, int pivotYType, float pivotYValue) |
fromDegrees:旋转开始角度
toDegrees:旋转结束角度
pivotXType:X坐标伸缩模式(取值有Animation.ABSOLUTE、Animation.RELATIVE_TO_SELF、Animation.RELATIVE_TO_PARENT)
pivotXValue:相对于X坐标伸缩值
pivotYType:Y坐标伸缩模式(取值有Animation.ABSOLUTE、Animation.RELATIVE_TO_SELF、 Animation.RELATIVE_TO_PARENT.)
pivotYValue:相对于Y坐标伸缩值
|
Tween动画可以通过两种编码方式来实现:一种是直接通过硬编码的方式在程序代码中实现;另一种是在配置文件中定义。对于Android系统来讲,建议使用配置文件的方法,这种方式可扩展性较高,便于维护。
首先,通过一个实现了各种动画实例来演示硬编码方式的实现过程。
在该实例中,界面中添加一个ImageView组件和4个Button组件。ImageView组件用于显示动画的图标。4个Button分别相应单击事件实现不同的动画效果。实例步骤说明如下:
(1)创建一个Android工程“GraphicAnimation”。
(2)在工程的res//drawable//目录中添加一个girl.png图片资源。
(3)在该工程的res//layout//目录中创建一个main.xml布局文件,在该布局文件中添加4个Button组件和一个ImageView组件,并为ImageView组件设置资源引用android:src属性。代码如代码清单1所示。
代码清单1 main.xml
<?xml version="1.0" encoding="utf-8"?>
<LinearLayout xmlns:android="//schemas.android.com/apk/res/android"
android:orientation="vertical"
android:layout_width="fill_parent"
android:layout_height="fill_parent"
>
<ImageView
android:layout_width="wrap_content"
android:layout_height="wrap_content"
android:id="@+id/ImageView01"
android:src="@drawable/girl"
></ImageView>
<Button
android:layout_height="wrap_content"
android:id="@+id/Button01"
android:text="Test Scale..."
android:layout_width="wrap_content"></Button>
<Button
android:layout_height="wrap_content"
android:id="@+id/Button02"
android:text="Test Alpha..."
android:layout_width="wrap_content"></Button>
<Button
android:layout_height="wrap_content"
android:id="@+id/Button03"
android:text="Test Translate..."
android:layout_width="wrap_content"></Button>
<Button
android:layout_height="wrap_content"
android:id="@+id/Button04"
android:text="Test Ratate..."
android:layout_width="wrap_content"></Button>
</LinearLayout>
(4)在MainActivity类的顶部声明使用到的Button和ImageView组件,在onCreate()方法中实例化。代码如代码清单2所示。
代码清单2 MainActivity.java
package cn.com.farsight.graphicanimation;
import android.app.Activity;
import android.os.Bundle;
import android.widget.Button;
import android.widget.ImageView;
public class MainActivity extends Activity {
//声明使用到的Button视图组件
private Button b1,b2,b3,b4;
//声明使用到的ImageView组件
private ImageView girlImage;
/** Called when the activity is first created. */
@Override
public void onCreate(Bundle savedInstanceState) {
super.onCreate(savedInstanceState);
setContentView(R.layout.main);
//实例化视图组件
girlImage = (ImageView) findViewById(R.id.ImageView01);
b1 = (Button) findViewById(R.id.Button01);
b2 = (Button) findViewById(R.id.Button02);
b3 = (Button) findViewById(R.id.Button03);
b4 = (Button) findViewById(R.id.Button04);
}
}
(5)分别为4个按钮添加单击事件监听器,在监听器的方法中通过构造方法定义不同的动画,调用动画的setDuration()方法设置动画持续事件,调用ImageView的startAnimation()方法开始动画。代码如代码清单3所示。
代码清单3 添加事件监听
//为按钮添加监听事件
b1.setOnClickListener(new OnClickListener(){
@Override
public void onClick(View v) {
// TODO Auto-generated method stub
//创建Scale(尺寸)变化动画
Animation scaleAnimation = new ScaleAnimation(0f, 1f, 0f, 1f,
Animation.RELATIVE_TO_SELF, 0.5f,
Animation.RELATIVE_TO_SELF, 0.5f);
//设置动画持续时间
scaleAnimation.setDuration(3000);
//开始动画
girlImage.startAnimation(scaleAnimation);
}
});
b2.setOnClickListener(new OnClickListener(){
@Override
public void onClick(View v) {
// TODO Auto-generated method stub
//创建Alpha(渐变)动画
Animation alphaAnimation = new AlphaAnimation(0.1f,0.1f);
//设置动画持续时间
alphaAnimation.setDuration(3000);
//开始动画
girlImage.startAnimation(alphaAnimation);
}
});
b3.setOnClickListener(new OnClickListener(){
@Override
public void onClick(View v) {
// TODO Auto-generated method stub
//创建Translate(位置变化)动画
Animation translateAnimation = new TranslateAnimation(10,100,10,100);
//设置动画持续时间
translateAnimation.setDuration(3000);
//开始动画
girlImage.startAnimation(translateAnimation);
}
});
b4.setOnClickListener(new OnClickListener(){
@Override
public void onClick(View v) {
// TODO Auto-generated method stub
//创建Rotate(旋转)动画
Animation rotateAnimation = new RotateAnimation(0f,+360f,
Animation.RELATIVE_TO_SELF,0.5f,
Animation.RELATIVE_TO_SELF,0.5f);
//设置动画持续时间
rotateAnimation.setDuration(3000);
//开始动画
girlImage.startAnimation(rotateAnimation);
}
});
程序运行结果如图1和图2所示。
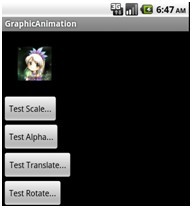

图1 动画效果Scale和Alpha
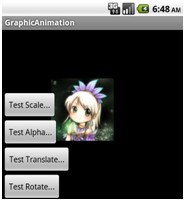
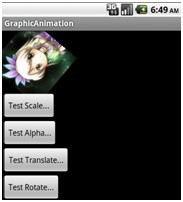
图2 动画效果Translate和Rotate
以上讲述的是通过硬编码的方式来实现的4种不同的动画效果,其实Android系统更推荐我们使用XML配置文件的方式来实现,该XML文件位于工程的res//anim//目录中。XML文件的格式如代码清单4所示。
代码清单4 XML配置文件格式
<set android:shareInterpolator=boolean>
<alpha android:fromAlpha=float
android:toAlpha=float>
<scale android:fromXScale=float
android:toXScale=float
android:fromYScale=float
android:toYScale=float
android:pivotX=string
android:pivotY=string>
<translate android:fromX=string
android:toX=string
android:fromY=string
android:toY=string>
<rotate android:fromDegrees=float
android:toDegrees=float
android:pivotX=string
android:pivotY=string>
<interpolator tag>
<set>
</set>
如上所示,必须要有一个set根元素,根元素里边定义不同的动画,如渐变(Alpha)、尺寸(Scale)、位置变化(Translate)和旋转(Rotate)等。
下面通过实例来演示如何使用XML配置文件实现各种动画效果。基本思路是在工程的res/anim/目录下定义不同的动画配置文件。通过调用AnimationUtils.loadAnimatioin()方法获得动画实例,调用视图组件的startAnimation()方法开始动画。实例具体步骤说明如下。
(1)创建一个Android工程“Graphic_Animation”。
(2)在工程的res/drawable/目录中添加一个girl.png图片资源。
(3)在该工程的res/layout/目录中创建一个main.xml布局文件,在该布局文件中添加4个Button组件和一个ImageView组件,并为ImageView组件设置资源引用android:src属性。代码如代码清单5所示。
代码清单5 main.xml
<?xml version="1.0" encoding="utf-8"?>
<LinearLayout xmlns:android="//schemas.android.com/apk/res/android"
android:orientation="vertical"
android:layout_width="fill_parent"
android:layout_height="fill_parent"
>
<ImageView
android:layout_width="wrap_content"
android:layout_height="wrap_content"
android:id="@+id/ImageView01"
android:src="@drawable/girl"
></ImageView>
<Button
android:layout_height="wrap_content"
android:id="@+id/Button01"
android:text="Test Scale..."
android:layout_width="wrap_content"></Button>
<Button
android:layout_height="wrap_content"
android:id="@+id/Button02"
android:text="Test Alpha..."
android:layout_width="wrap_content"></Button>
<Button
android:layout_height="wrap_content"
android:id="@+id/Button03"
android:text="Test Translate..."
android:layout_width="wrap_content"></Button>
<Button
android:layout_height="wrap_content"
android:id="@+id/Button04"
android:text="Test Rotate..."
android:layout_width="wrap_content"></Button>
</LinearLayout>
(4)在MainActivity类的顶部声明使用到的Button和ImageView组件,在onCreate()方法中将其实例化。
代码清单6 MainActivity.java
package cn.com.farsight.graphicanimation;
import android.app.Activity;
import android.os.Bundle;
import android.view.View;
import android.view.View.OnClickListener;
import android.view.animation.AlphaAnimation;
import android.view.animation.Animation;
import android.view.animation.RotateAnimation;
import android.view.animation.ScaleAnimation;
import android.view.animation.TranslateAnimation;
import android.widget.Button;
import android.widget.ImageView;
public class MainActivity extends Activity {
//声明使用到的Button视图组件
private Button b1,b2,b3,b4;
//声明使用到的ImageView组件
private ImageView girlImage;
/** Called when the activity is first created. */
@Override
public void onCreate(Bundle savedInstanceState) {
super.onCreate(savedInstanceState);
setContentView(R.layout.main);
//实例化视图组件
girlImage = (ImageView) findViewById(R.id.ImageView01);
b1 = (Button) findViewById(R.id.Button01);
b2 = (Button) findViewById(R.id.Button02);
b3 = (Button) findViewById(R.id.Button03);
b4 = (Button) findViewById(R.id.Button04);
}
}
(5)在工程的res/anim/目录下创建各种动画的XML配置文件,代码如代码清单7-10所示。
□ Alpha:
代码清单7 Alpha
<set xmlns:android="//schemas.android.com/apk/res/android">
<alpha android:fromAlhpa="0.1"
android:toAlpha="1.0"
android:duration="5000"
/>
</set>
□ Translate:
代码清单8 Translate
<set xmlns:android="//schemas.android.com/apk/res/android">
<translate
android: fromXDelta="10"
android:toXDelta="100"
android:fromYDelta="10"
android:toYDelta="100">
</translate>
</set>
□ Scale:
代码清单9 Scale
<set xmlns:android="//schemas.android.com/apk/res/android">
<Scale
android:fromXScale="0.0"
android:toXScale="1.0"
android:fromYScale="0.0"
android:toYScale="1.0"
android:pivotX="50%"
android:pivotY="50%"
android:duration="5000">
</scale>
</set>
□ Rotate:
代码清单10 Rotate
<set xmlns:android="//schemas.android.com/apk/res/android">
<rotate
android:fromDegrees="0"
android:toDegrees="-180"
android:pivotX="50%"
android:pivotY="50%"
android:duration="5000">
</rotate>
</set>
分别为4个按钮添加单击事件监听器,在监听器的方法中通过AnimationUtils. loadAnimation()方法定义不同的动画,调用ImageView的startAnimation()方法开始动画。
代码清单11 添加事件监听
//为按钮添加监听事件
b1.setOnClickListener(new OnClickListener(){
@Override
public void onClick(View v) {
//创建Scale(尺寸)变化动画
Animation scaleAnimation = AnimationUtils.loadAnimation
(MainActivity.this,R.anim.my_scale);
//开始动画
girlImage.startAnimation(scaleAnimation);
}
});
b2.setOnClickListener(new OnClickListener(){
@Override
public void onClick(View v) {
//创建Alpha(渐变)动画
Animation alphaAnimation = AnimationUtils.loadAnimation
(MainActivity.this,R.anim.my_alpha);
//开始动画
girlImage.startAnimation(alphaAnimation);
}
});
b3.setOnClickListener(new OnClickListener(){
@Override
public void onClick(View v) {
//创建Translate(位置变化)动画
Animation translateAnimation = AnimationUtils.loadAnimation
(MainActivity.this,R.anim.my_translate);
//开始动画
girlImage.startAnimation(translateAnimation);
}
});
b4.setOnClickListener(new OnClickListener(){
@Override
public void onClick(View v) {
//创建Rotate(旋转)动画
Animation rotateAnimation = AnimationUtils.loadAnimation
(MainActivity.this,R.anim.my_rotate);
//开始动画
girlImage.startAnimation(rotateAnimation);
}
});
程序运行结果如图3和图4所示

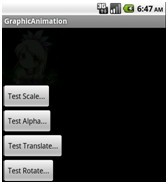
图3 动画效果Scale和Alpha
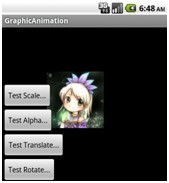

图4 动画效果Translate和Rotate